


为什么想要使用SSH?
海思3559C默认支持telnet、FTP以及NFS等多种方式来实现板端调试,其中Telnet虽然方便,但安全度欠佳,且不支持文件传输。为了更好地学习和掌握3559C,我们进一步寻求挑战,希望通过练习OpenSSH的移植,提升技能水平,更好地满足学习与实践的需求。
准备工作
由于OpenSSH需要依赖Zlib和OpenSSL,所以分别先去官网下载Zlib、OpenSSL和OpenSSH的源代码,我比较喜欢较新的版本,所以我选择了zlib-1.3、openssl-3.0.11和openssh-9.4p1。截止发文openssh最新版本为OpenSSH 9.5 released October 4, 2023。
zlib是一套通用的解压缩开源库,提供了内存(in-memory)压缩和解压函数,能检测解压出来的数据完整性,zlib 也支持读写 gzip (.gz) 格式的文件。
在OpenSSH中,Zlib主要用于压缩传输的数据,以减少网络带宽的使用并提高传输效率。通过数据压缩,OpenSSH可以更快地传输数据,从而提高了远程访问和文件传输的性能。
参考:第三方库介绍——zlib库-CSDN博客
OpenSSL是一个强大的安全套接字层库,它提供了丰富的加密和安全功能。在OpenSSH中,OpenSSL用于实现SSH协议的加密和安全通信。它负责在远程主机和本地主机之间建立安全的加密连接,并确保数据的机密性和完整性。OpenSSL的加密算法和安全功能可以保护用户身份验证、远程命令执行和文件传输等敏感操作免受中间人攻击和数据窃听等威胁。
在本次的学习中,使用了OpenSSL里面的加密算法来生成RSA密钥,其他用法暂时没注意到。
OpenSSH是SSH协议下的首选远程登录连接工具。它通过加密所有流量来消除窃听、连接劫持和其他攻击,确保通信的安全性。此外,OpenSSH还提供了一套安全隧道功能、多种身份验证方法以及复杂的配置选项,使用户能够更加灵活地进行远程操作。
OpenSSH套件包含以下工具:
远程操作工具:ssh、scp和sftp,这些工具可确保您在进行远程操作时,数据的安全传输和便捷管理。
密钥管理工具:ssh-add、ssh-keysign、ssh-keyscan和ssh-keygen,这些工具协助您管理密钥,确保身份验证和数据传输的安全性。
服务端工具:包括sshd、sftp-server和ssh-agent,它们提供服务端支持,确保服务的稳定性和安全性。
交叉编译OpenSSH
Zlib和OpenSSL的交叉编译较简单,此处省略吧,看看项目的readme.md和configure 的help配置下交叉编译工具和输出目录即可。
对于OpenSSH的编译,我主要参考了代码目录中的INSTALL和configure 的help来进行配置。在INSTALL文档中对zlib和openssh的版本有要求:
INSTALL中比较重要的一部分(下方有翻译):
以下是上述文本的翻译:
构建/安装
————————–
要使用默认选项安装OpenSSH:
./configure
make
make install
这将在/usr/local/bin中安装OpenSSH二进制文件,配置文件在/usr/local/etc中,服务器在/usr/local/sbin中,等等。要指定不同的安装前缀,请使用–prefix选项配置:
./configure --prefix=/opt
make
make install
这将在/opt/{bin,etc,lib,sbin}中安装OpenSSH。您还可以覆盖特定路径,例如:
./configure --prefix=/opt --sysconfdir=/etc/ssh
make
make install
这将在/opt/{bin,lib,sbin}中安装二进制文件,但将配置文件放在/etc/ssh中。
如果使用PAM,您可能需要手动安装一个PAM控制文件,如”/etc/pam.d/sshd”(或者您系统首选的位置)。请注意,用于启动PAM的服务名称是__progname,它是您的sshd路径的基本名称(例如,/usr/sbin/osshd的服务名称将是osshd)。如果已重命名sshd可执行文件,则可能需要修改PAM配置。
一个通用的PAM配置文件包含在”contrib/sshd.pam.generic”中,您可能需要在在系统上使用之前编辑它。如果使用的是Red Hat Linux的最新版本,则contrib/redhat/sshd.pam中的配置文件可能更有用。未安装有效的PAM文件可能导致无法使用密码身份验证。在HP-UX 11和Solaris上,标准的/etc/pam.conf配置将与sshd匹配(sshd将匹配其他服务名称)。
configure脚本还有一些其他选项:
–with-audit=[module]:通过指定的模块启用附加审核。目前支持“debug”(通过syslog提供附加信息)和“bsm”(Sun的基本安全模块)的驱动程序。
–with-pam:启用PAM支持。如果编译了PAM支持,则还必须在sshd_config中启用它(参考UsePAM指令)。
–with-prngd-socket=/some/file:允许您启用EGD或PRNGD支持,并指定PRNGd套接字。如果您的Unix缺少/dev/random,请使用此选项。
–with-prngd-port=portnum:允许您启用EGD或PRNGD支持,并指定EGD本地主机TCP端口。如果您的Unix缺少/dev/random,请使用此选项。
–with-lastlog=FILE:指定lastlog文件的位置。./configure在几个位置搜索lastlog,但如果lastlog安装在不同的地方,则可能找不到它。
–without-lastlog:完全禁用lastlog支持。
–with-osfsia,–without-osfsia:启用或禁用OSF1的安全集成体系结构。OSF1机器的默认值为启用。
–with-utmpx:启用utmpx支持。对于某些平台,utmpx支持是自动的。
–without-shadow:禁用阴影密码支持。
–with-ipaddr-display:强制在$DISPLAY环境变量中使用数值IP地址。一些不正常的系统需要这个。
–with-default-path=PATH:允许您为由sshd启动的会话指定默认$PATH。这完全替代了标准路径。
–with-pid-dir=PATH:指定创建sshd.pid文件的目录。
–with-xauth=PATH:指定xauth二进制文件的位置。
–with-ssl-dir=DIR:允许您指定Libre/OpenSSL库的安装位置。
–with-ssl-engine:启用Libre/OpenSSL的(硬件)ENGINE支持。
–without-openssl:构建时不使用OpenSSL。在此配置中只支持密码和算法的子集。
–without-zlib:构建时不使用zlib。这将禁用压缩选项。
–with-4in6:检查IPv6映射地址中的IPv4,并将其转换为真正的(AF_INET)IPv4地址。在Linux上解决一些怪异问题。
如果需要向编译器或链接器传递特殊选项,可以在运行./configure之前将这些选项指定为环境变量。例如:
CC="/usr/foo/cc" CFLAGS="-O" LDFLAGS="-s" LIBS="-lrubbish" ./configure我使用的配置脚本
#我第一次使用的配置脚本
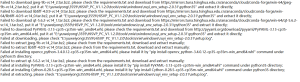
./configure --prefix=/home/user/work/hisi/ssh/openssh-9.4p1/install/ --host=arm-linux CC=aarch64-himix100-linux-gcc AR=aarch64-himix100-linux-ar --with-zlib=/home/user/work/hisi/ssh/zlib-1.3/install/ --with-ssl-dir=/home/user/work/hisi/ssh/openssl-3.0.11/install/还存在一些问题:
- 要修改下 –prefix= 改成一个根目录下的路径,默认生成的sshd_conf内容会包含这个路径。


最终使用的编译脚本
./configure  --prefix=/usr/local/ssh --with-privsep-path=/usr/local/ssh/empty --host=arm-linux CC=aarch64-himix100-linux-gcc AR=aarch64-himix100-linux-ar --with-zlib=/home/user/work/hisi/ssh/zlib-1.3/install/ --with-ssl-dir=/home/user/work/hisi/ssh/openssl-3.0.11/install --disable-strip

#编译完成后执行
make -j8

#使用sudo权限的账号make install 有无法执行的报错我直接忽视掉了 交叉编译的确实在编译服务器执行不了
make install

#最终编译好的文件放到了/usr/local/ssh
#将可执行文件拷贝到了 /usr/bin 或者/usr/local/bin

#最后别忘记了把openssl和zlib的so文件也放到板端的lib目录下


#在开发板/etc/passwd 中添加下面这一行
sshd:x:74:74:Privilege-separated SSH:/var/empty/sshd:/sbin/nologin
#目的是为SSH守护程序(sshd)创建一个特殊的用户帐户

参考:https://blog.csdn.net/qq_43574160/article/details/124870387
成功截图
能够通过scp传输文件,也能正常使用FinalShell的功能。
交叉编译后的openssh 不含openssl和zlib的库文件:
https://www.123pan.com/s/9gktVv-s71Rv.html提取码:Mz1n
关键点就是压缩包里面的几个文件,以及文件所存放的位置。

遇到的问题
1. 运行sshd报错 sshd re-exec requires execution with an absolute path
报错:
/mnt/appfs/ssh/install/sbin # sshd
sshd re-exec requires execution with an absolute path
要使用绝对路径运行:
/sbin/sshd2. 运行sshd报错 /home/user/work/hisi/ssh/openssh-9.4p1/etc/sshd_config: No such file or directory
报错:
/mnt/appfs/ssh/install/sbin # /sbin/sshd
/home/user/work/hisi/ssh/openssh-9.4p1/install/etc/sshd_config: No such file or directory
和最初交叉编译配置的–prefix有关,可以单独指定配置文件运行:
/sbin/sshd -f /etc/sshd_config3. 运行sshd报错 Missing privilege separation directory: /home/user/work/hisi/ssh/openssh-9.4p1/install/var
还和最初交叉编译配置的–prefix有关,临时解决方案,把这个路径创建出来:
mkdir -p Missing privilege separation directory: /home/user/work/hisi/ssh/openssh-9.4p1/install/var交叉编译配置的脚本还是需要改一下的。
4. 运行sshd报错sshd: no hostkeys available — exiting.
先生成RSA的密钥,再修改sshd的配置文件
# 生成密钥
ssh-keygen -t rsa -f ssh_host_rsa_key -N ""

# 修改sshd_config 取消注释下面这一行  并且将密钥文件拷贝到对应路径  如果
#HostKey /usr/local/ssh/ssh_host_rsa_key-
ssh-keygen: 这是用于生成SSH密钥的命令行工具。 -
-t rsa: 指定生成RSA密钥对。RSA是一种非对称加密算法,常用于在SSH中进行身份验证。 -f ssh_host_rsa_key: 指定生成的私钥文件的名称。在这里生成的私钥文件将被命名为ssh_host_rsa_key-
-N "": 设置一个空密码(即不设置密码)以保护私钥文件。这样私钥文件将不需要密码才能访问。这在一些自动化场景下很有用,但在实际环境中,强烈建议为私钥文件设置密码以提高安全性。
5. sshd成功运行后 使用root登录密码无论如何就是不正确
#可能是因为没开启root用户登录

#找到自己的sshd配置文件
vi /etc/sshd_config
#在最后追加一行
PermitRootLogin yes
# 保存并退出
#重新运行sshd本网站尊重知识产权,如有侵权,请及时联系我们删除。
本站所有原创内容仅用于学习和交流目的,未经作者和本站授权不得进行商业使用或盈利行为。


暂无评论内容